Synchronizer
The Synchronizer allows users to operate multiple profiles simultaneously and synchronize actions (such as clicks, inputs, and page navigation) across these profiles in real time, ensuring efficient and seamless multitasking.
Launch Synchronizer
Currently, Synchronizer is only available for Windows system.
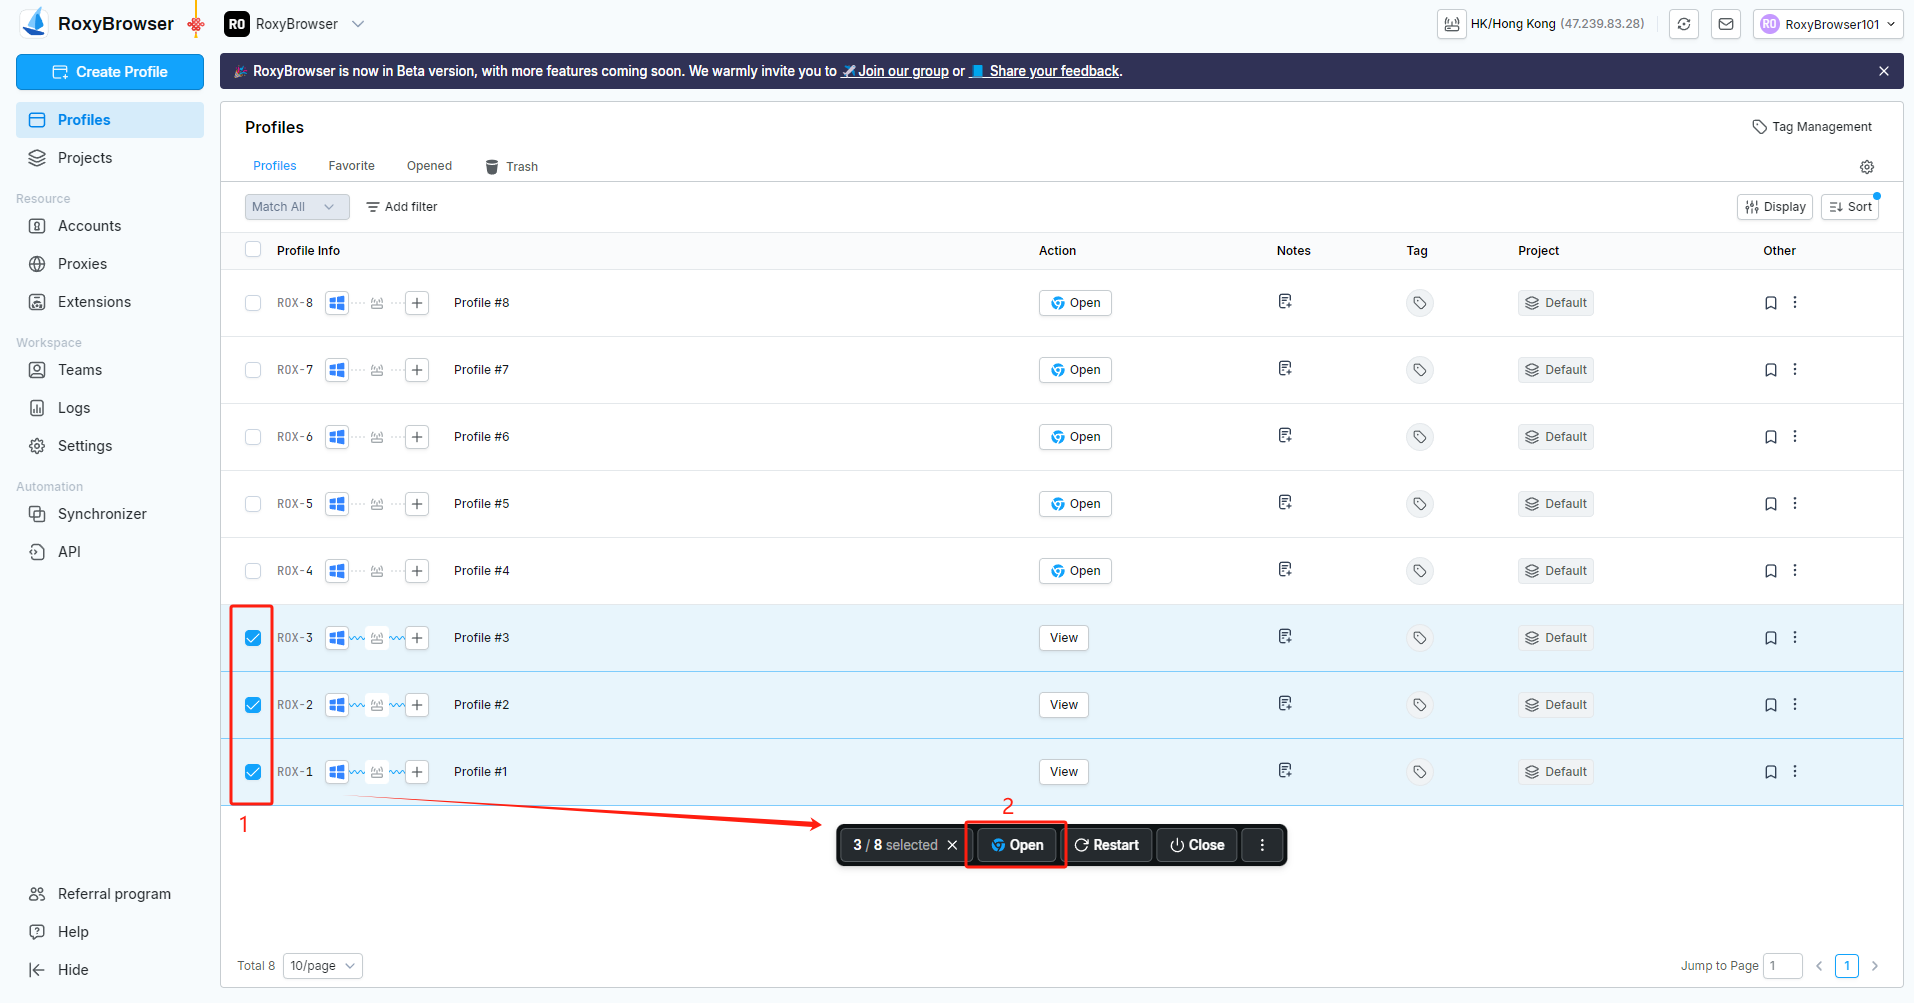
- Open the profiles you would like to synchronize in RoxyBrowser.
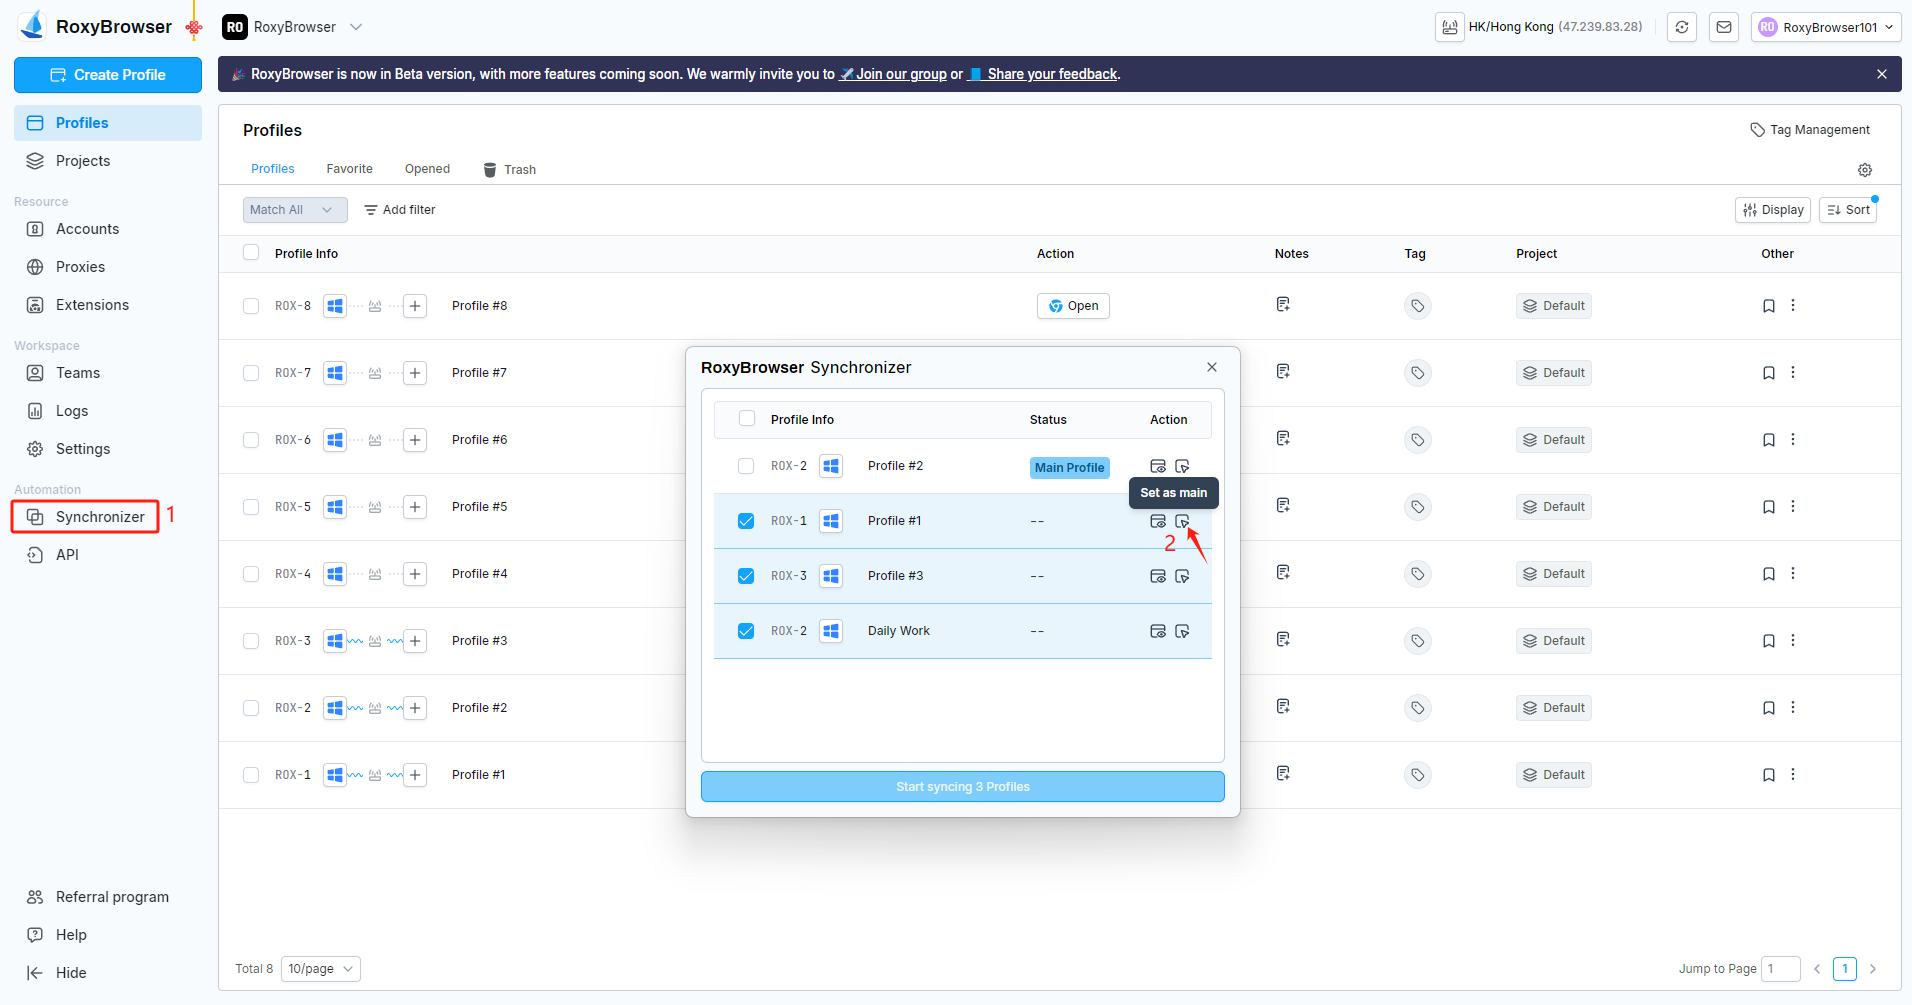
Click “Synchronizer” > Select the profiles you need to synchronize > set one of them as a “main window” (The other profiles will act as the controlled windows).
- Main Window:all actions performed in this window will be synchronized to the controlled windows.
- Controlled Window: it will synchronize all actions performed in the main window.
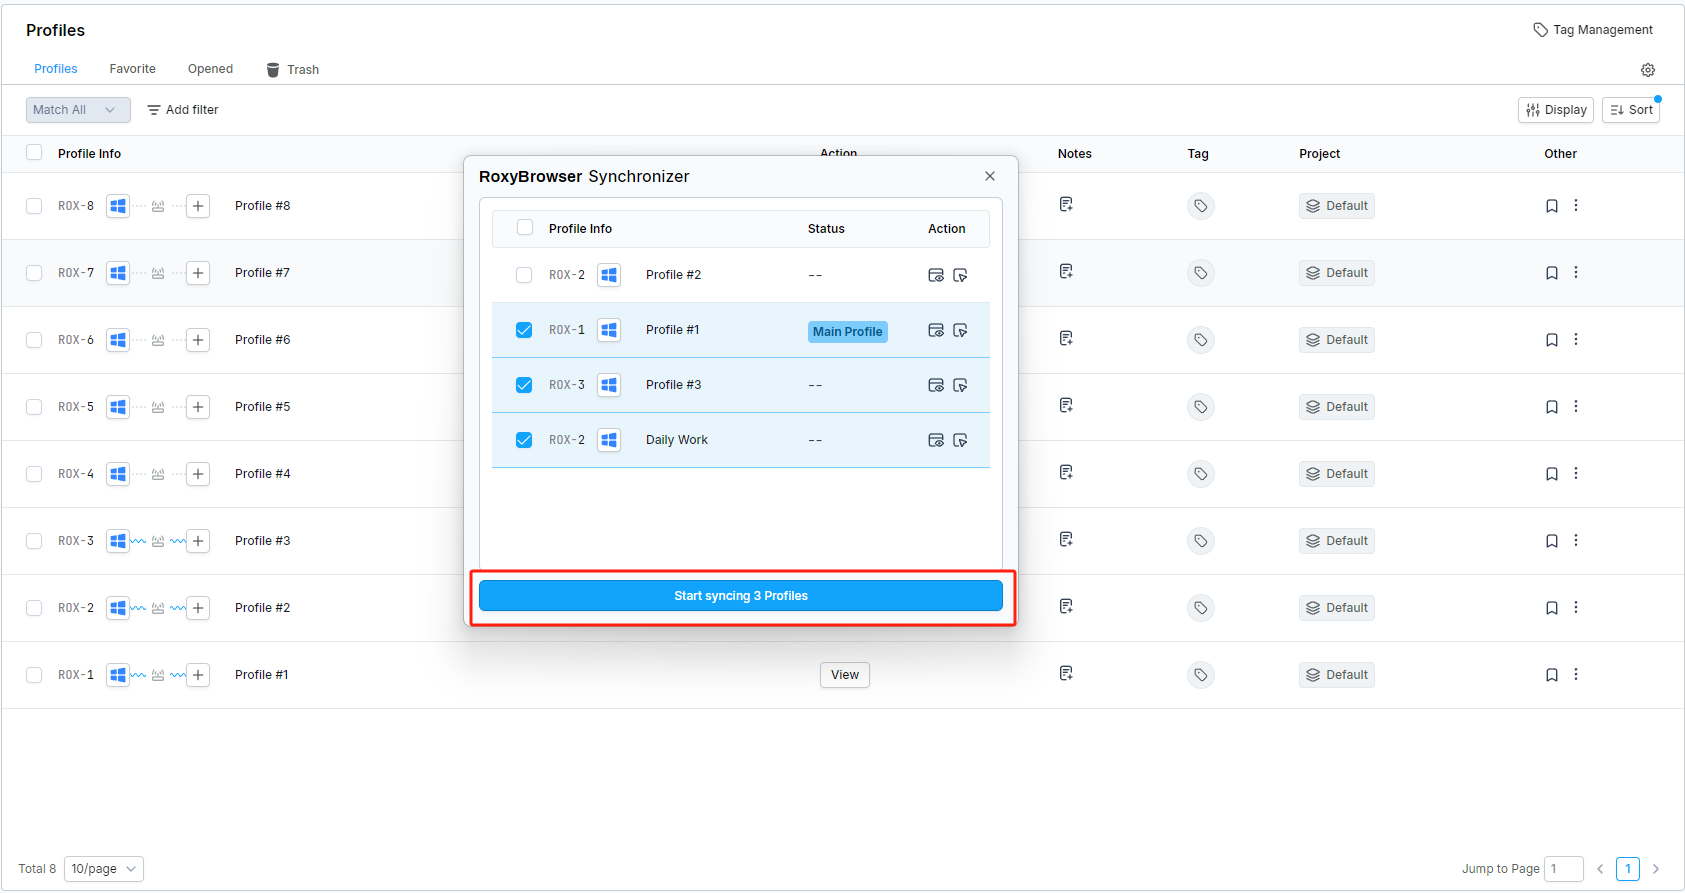
- After clicking “Start Sync”, the synchronization begins and the console will pop up. Note that the main window cannot be modified while synchronization is in progress.
- The main window defaults to blue and is placed in the top-left corner.
Console Introduction
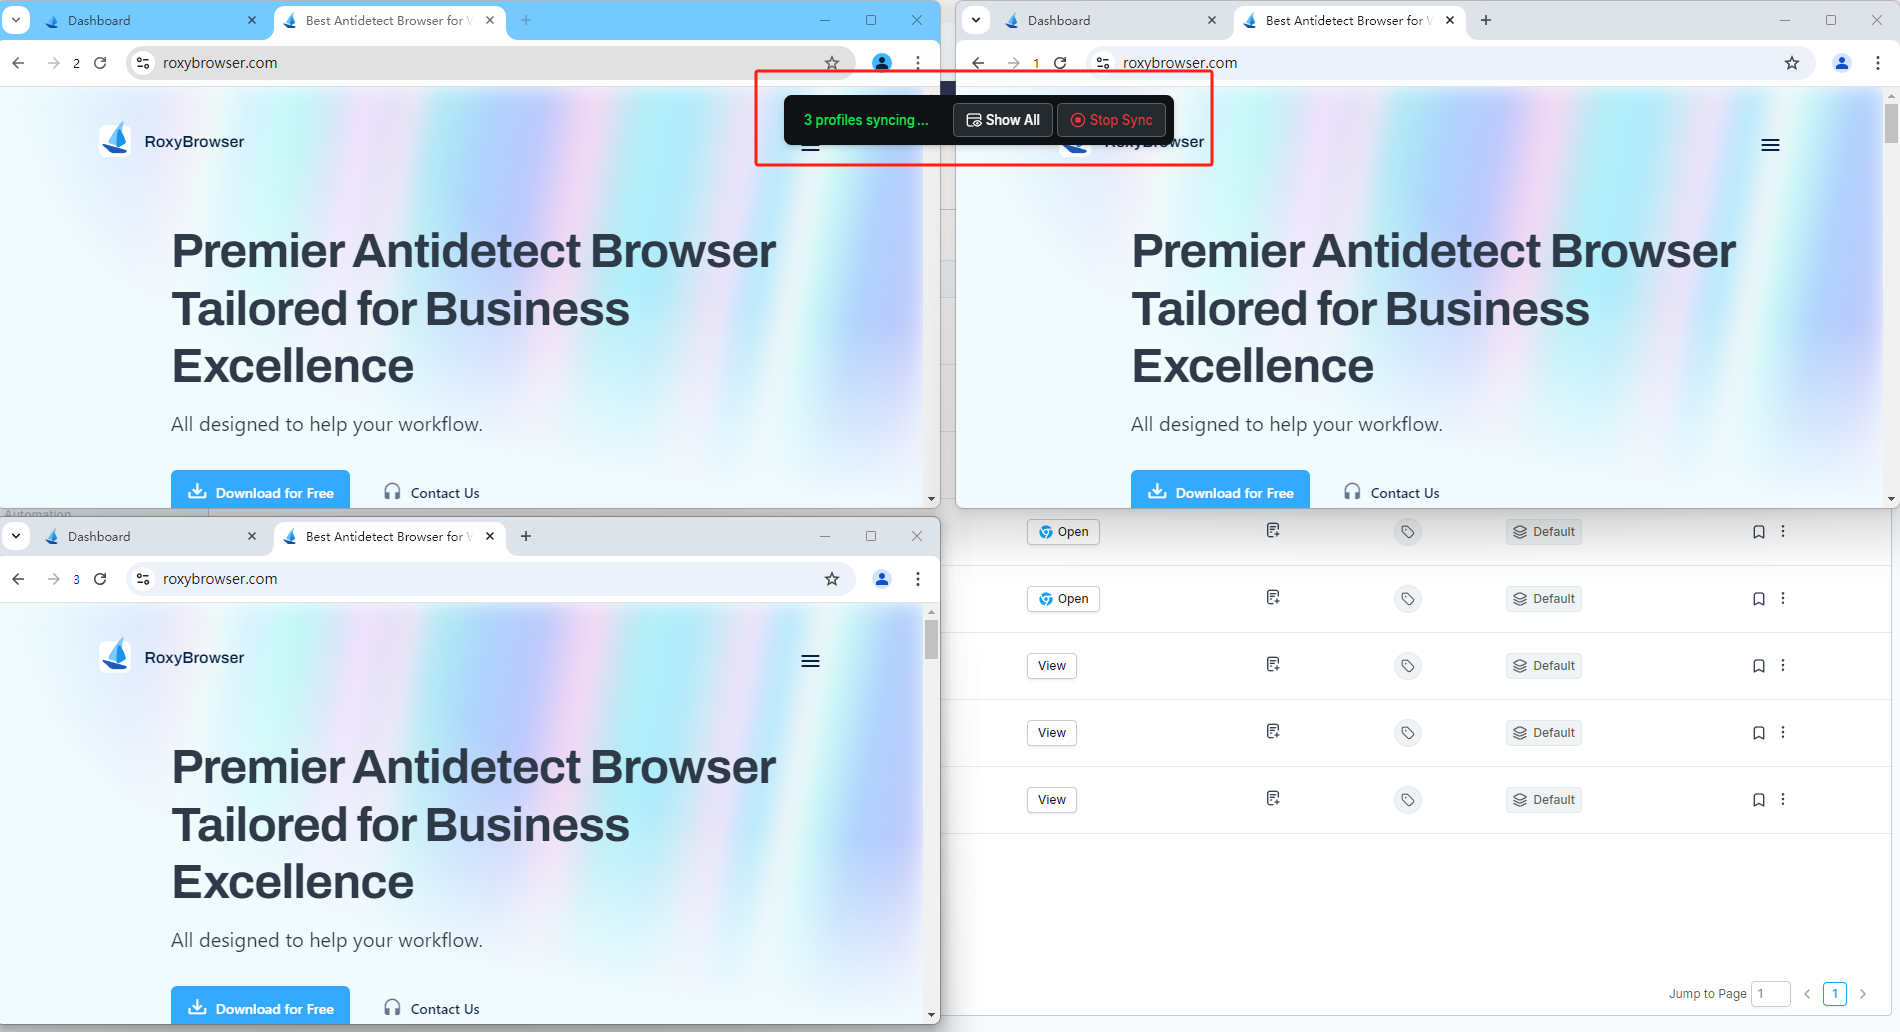
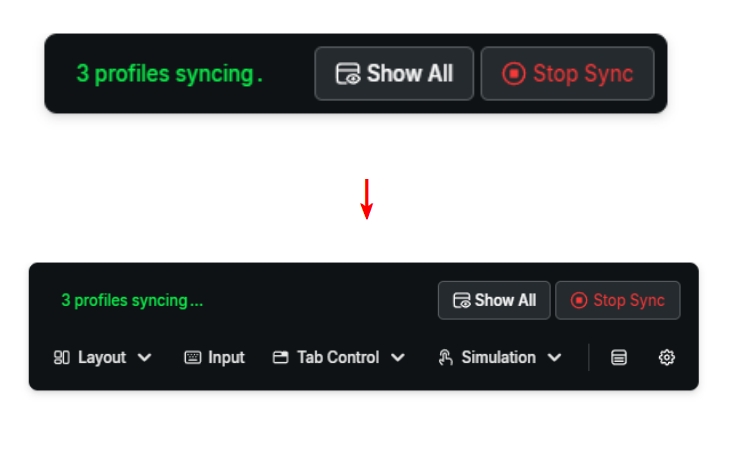
When there is no activity, the console will automatically minimize to display only the sync status and two basic functions: Show All and Stop Sync.
The interface will automatically expand to show all functions when you hover your mouse over the console.
Show All Profiles
After clicking, all profiles that are being synchronized will pop up.
Stop Sync
After clicking, the sync will stop, and a list of open profiles in RoxyBrowser will pop up. At this point, the main window will turn gray, and you can reselect the number of profiles to sync and choose a new main window.

Layout
Grid Layout
In this mode, all synced profiles will automatically resize and tile on the main screen.
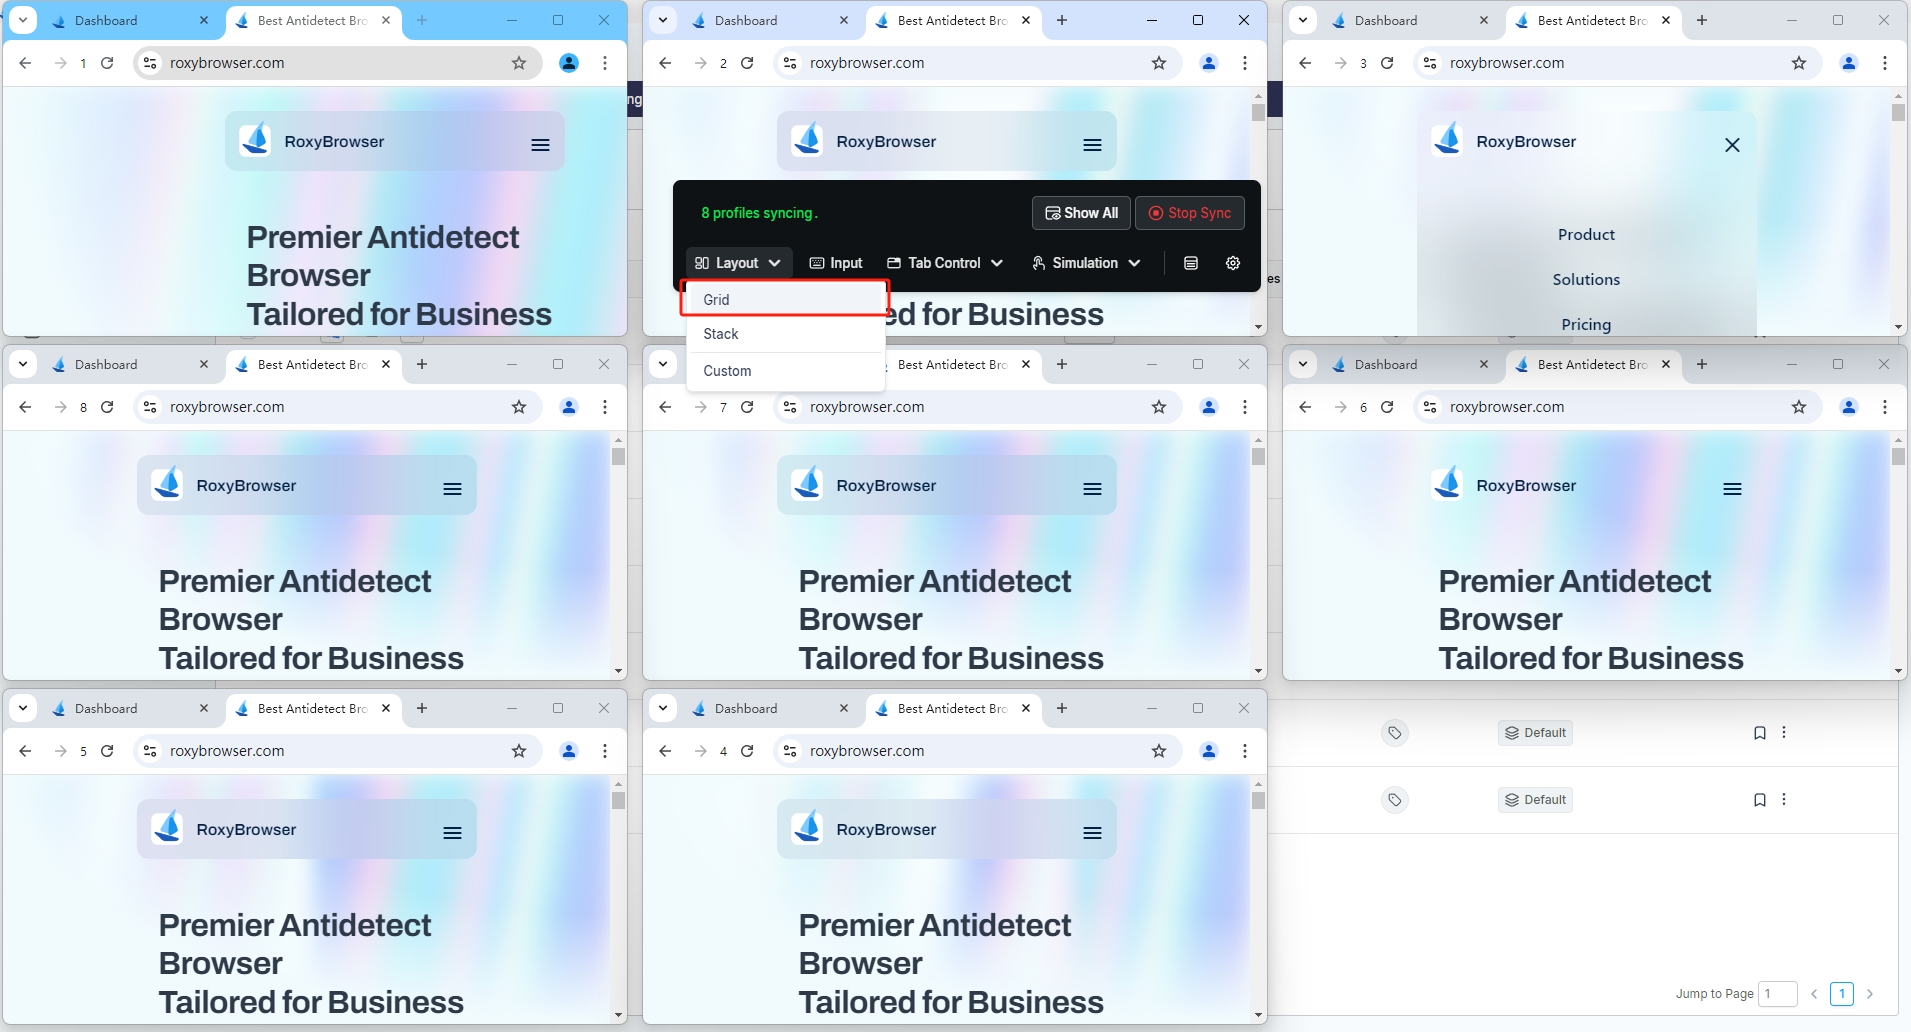
- The default arrangement of the profiles is in a grid layout.
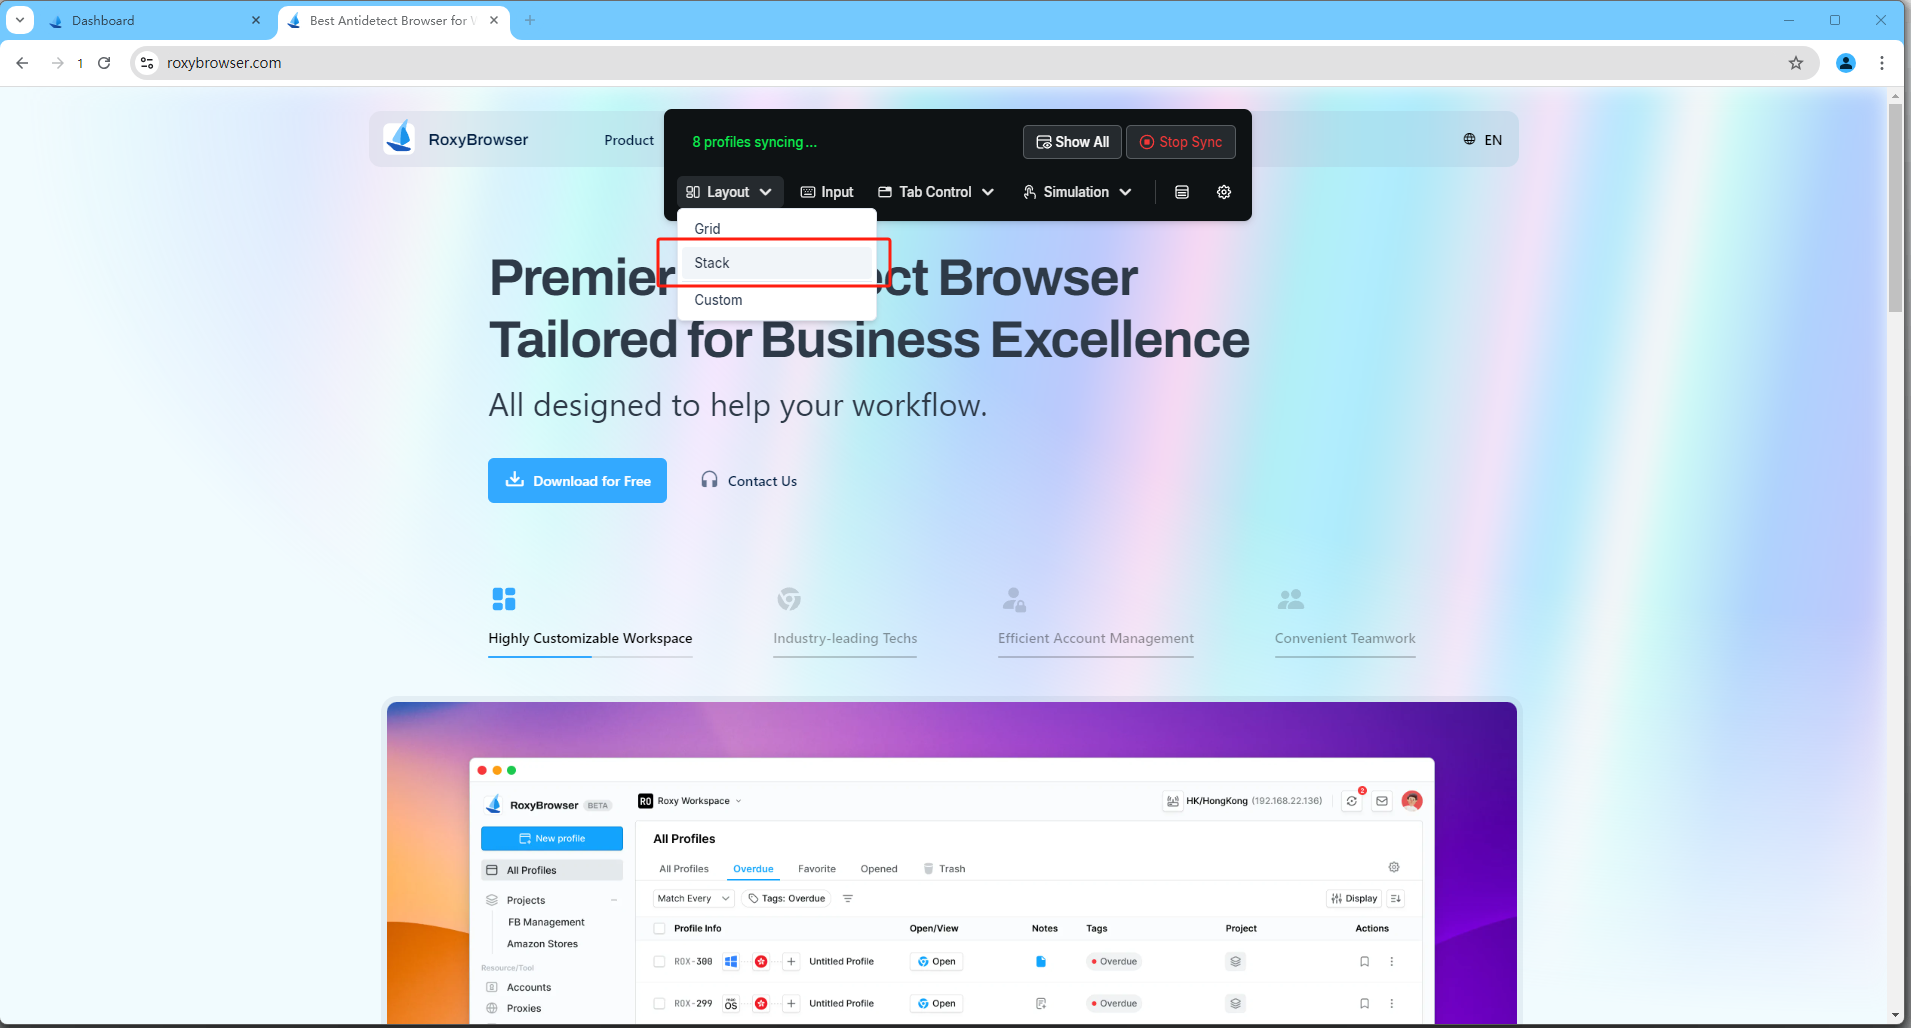
Stack Layout
In this layout, the synchronized profiles will fill the main screen and be arranged with the main window on top, followed by the controlled windows below it.
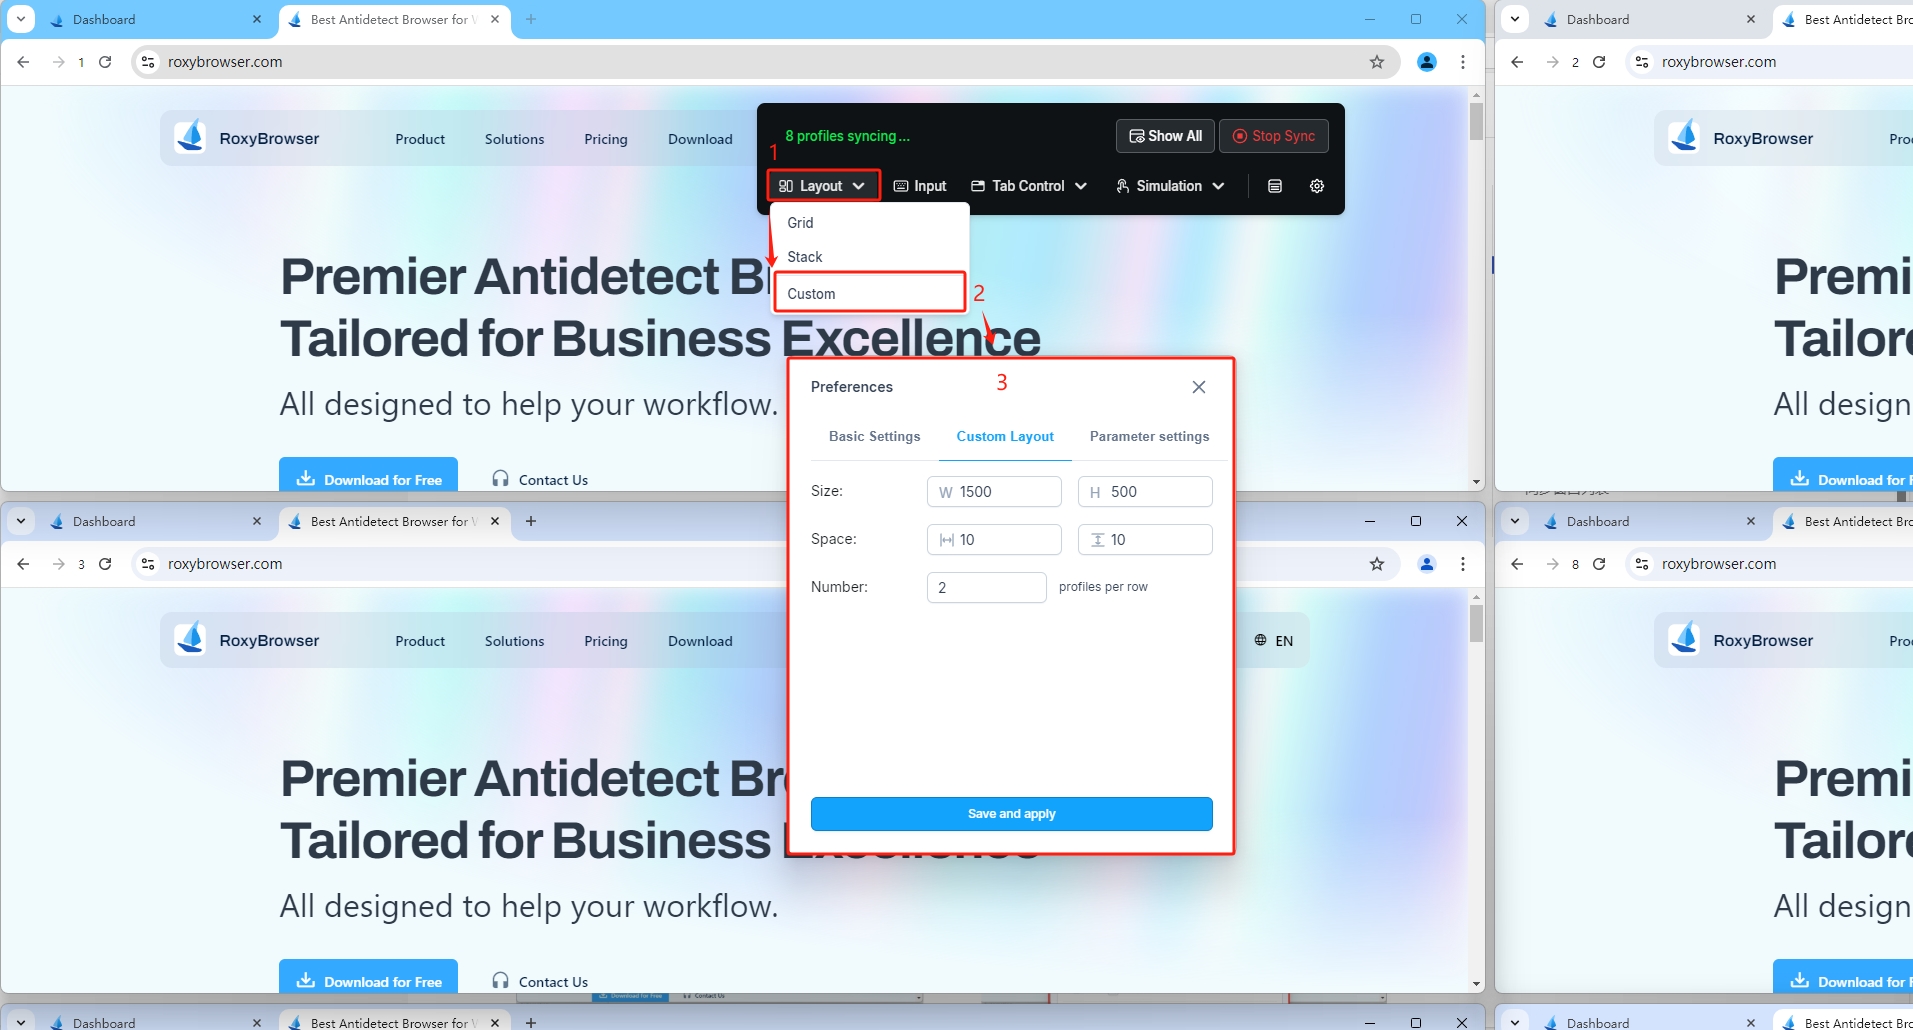
Custom Layout
In the custom settings, you can modify the layout by adjusting the size, spacing, and number of items per row.
For example, if you set the profile size to 1200x500, the profile spacing to 10x10, and 2 profiles per row, the main screen will display a horizontal layout where all profiles except the first and third will overflow the main screen.
Input
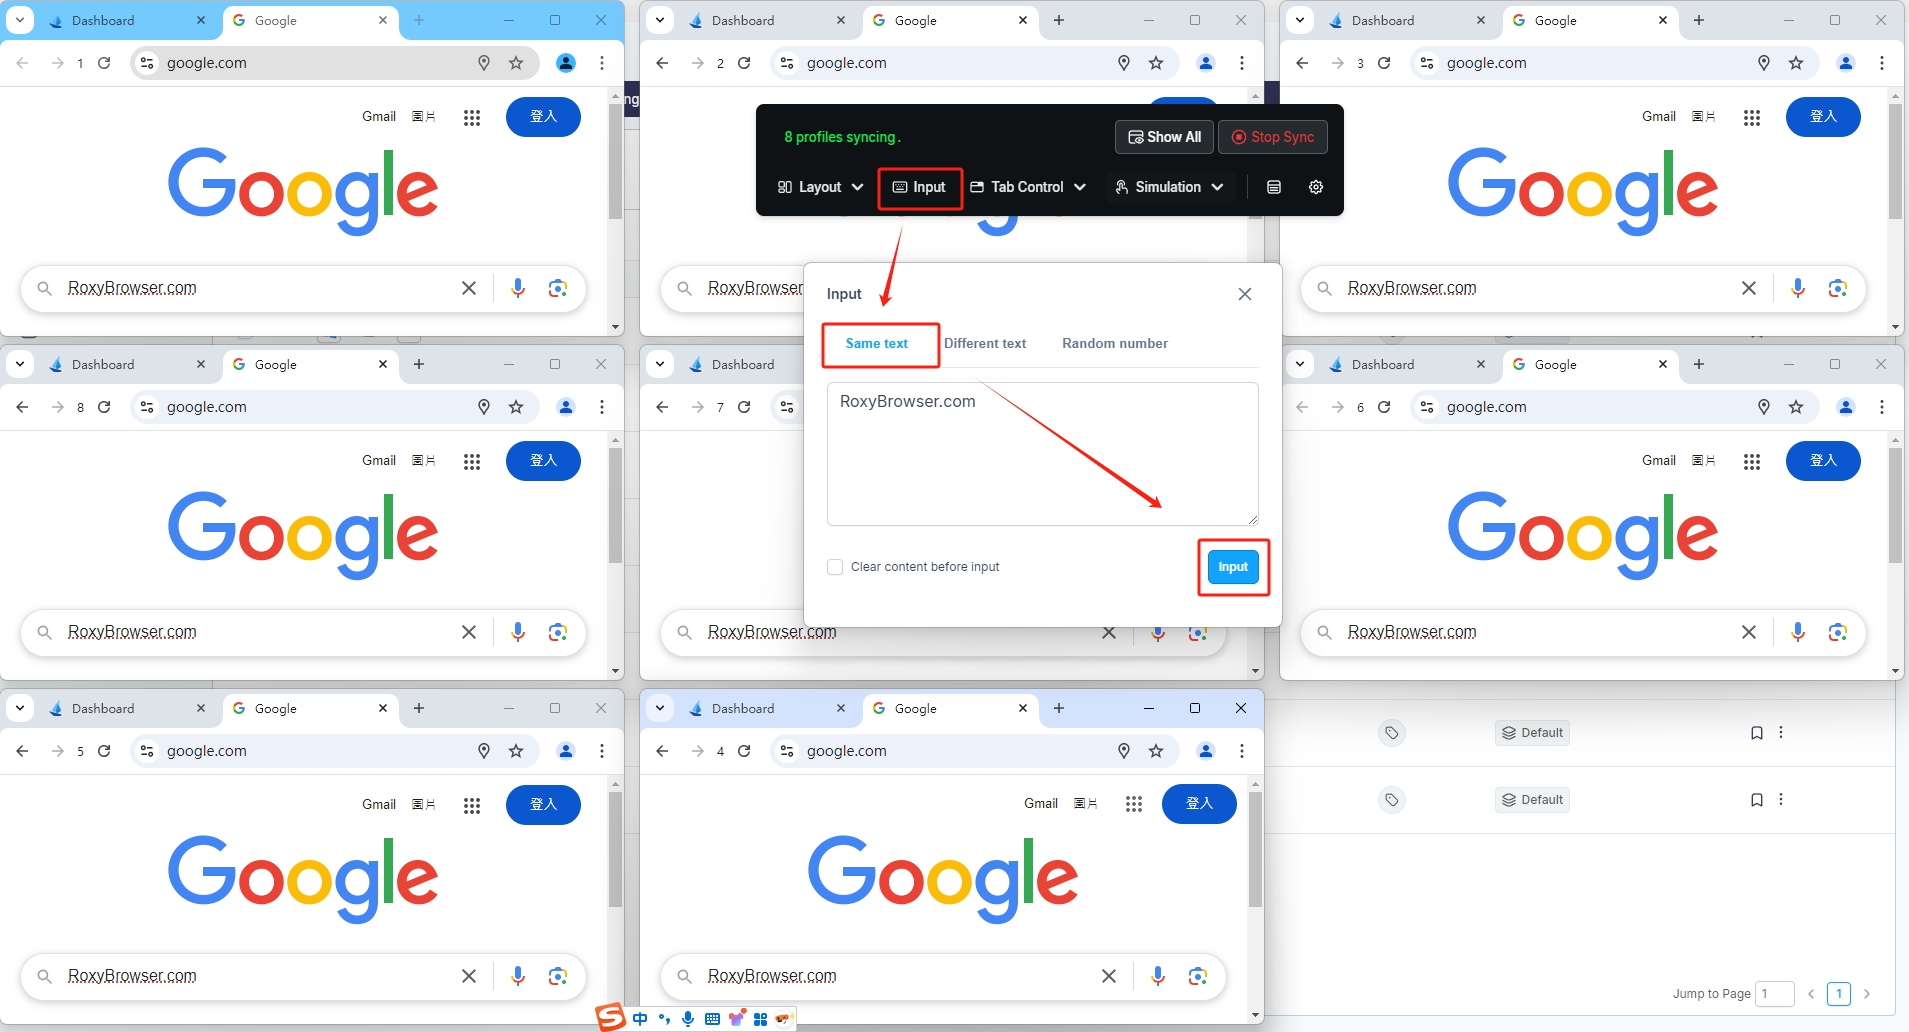
Same Text Input
- In the main window, click on the "input box" that needs to be filled with text.
- Open the console, select "Input" > "Same Text".
- Enter the content you want to sync.
- Click "Input", and the text will be filled into the input boxes of all profiles simultaneously.
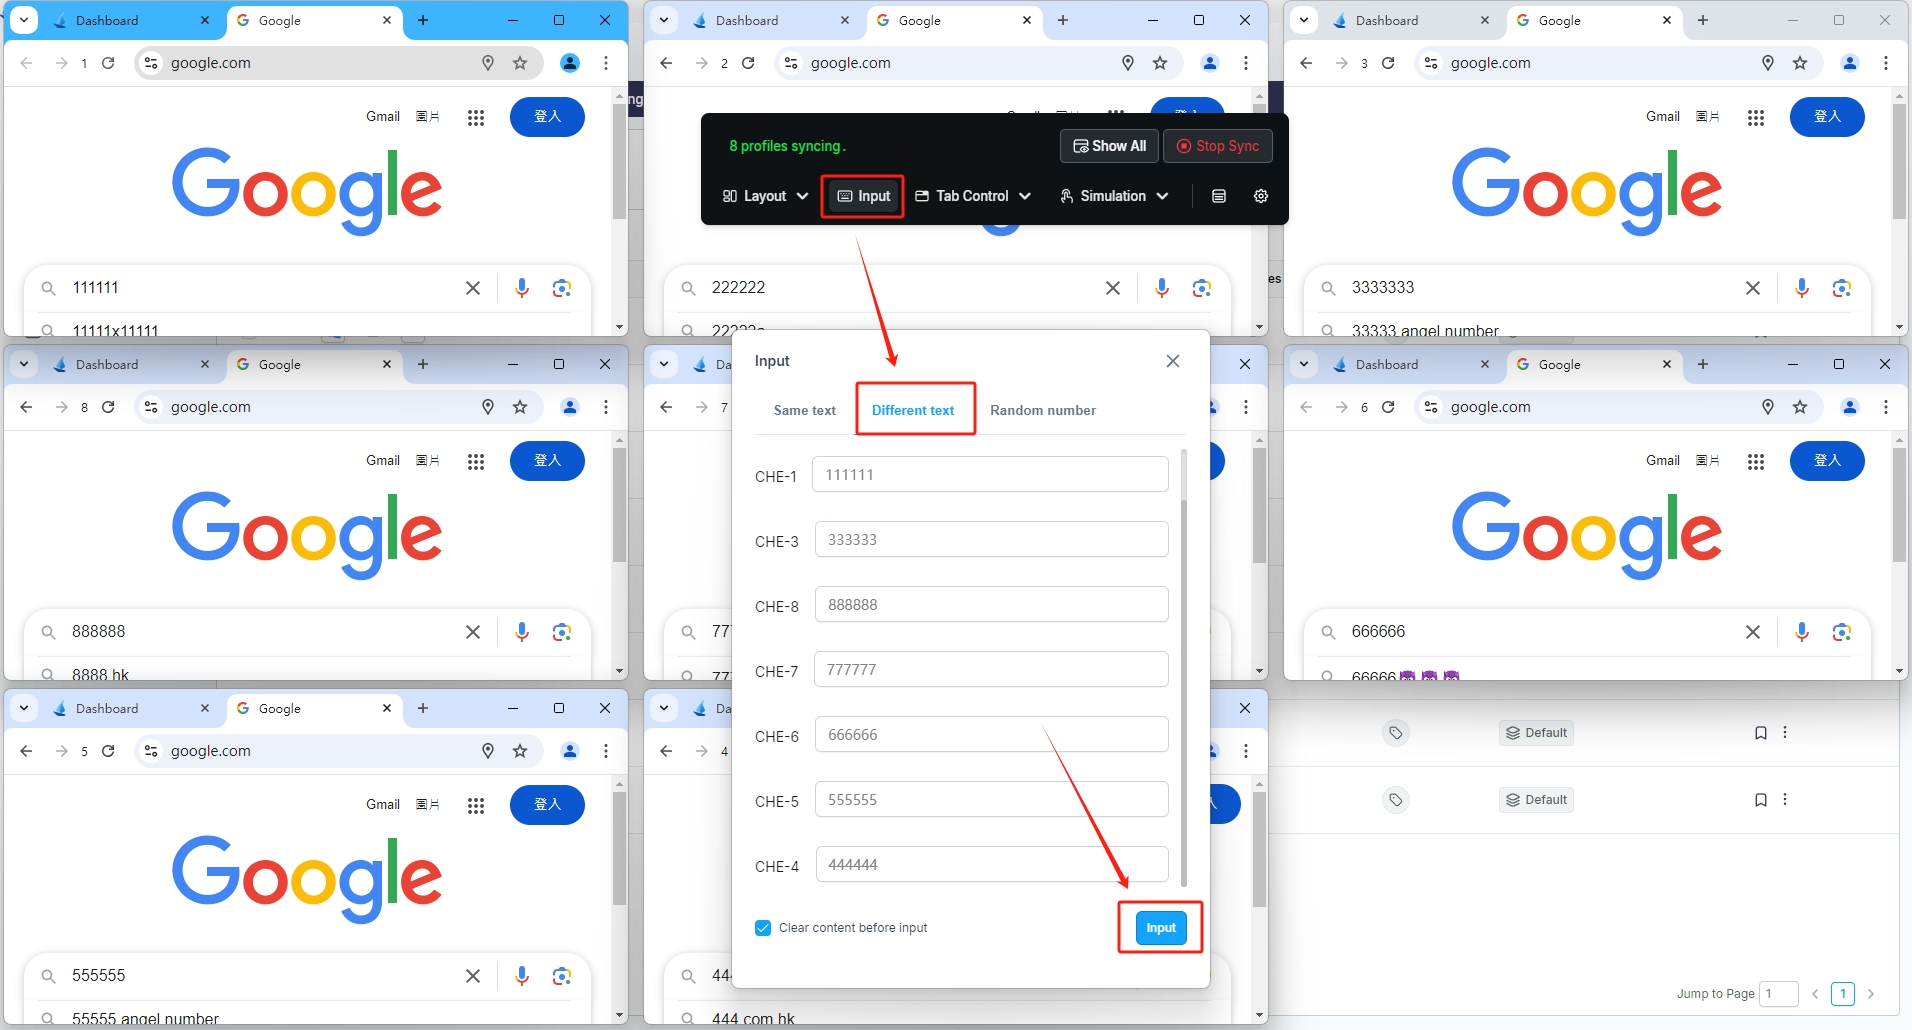
Different Text
- In the main window, click on the "input box" that needs to be filled with text.
- Open the console, select "Input" > "Dufferent Text".
- Enter different content in the corresponding Profiles > Click "Input".
- The text will be filled into the designated input boxes of the corresponding profiles according to the settings.
Random Number
- In the main window, click on the "input box" that needs to be filled with text.
- Open the console, select "Input" > "Random Number".
- Select "Integer" or "Decimal" as needed, and set the numerical range.
- Click "Input", and the system will randomly fill different numbers within the range into the input boxes of all profiles.
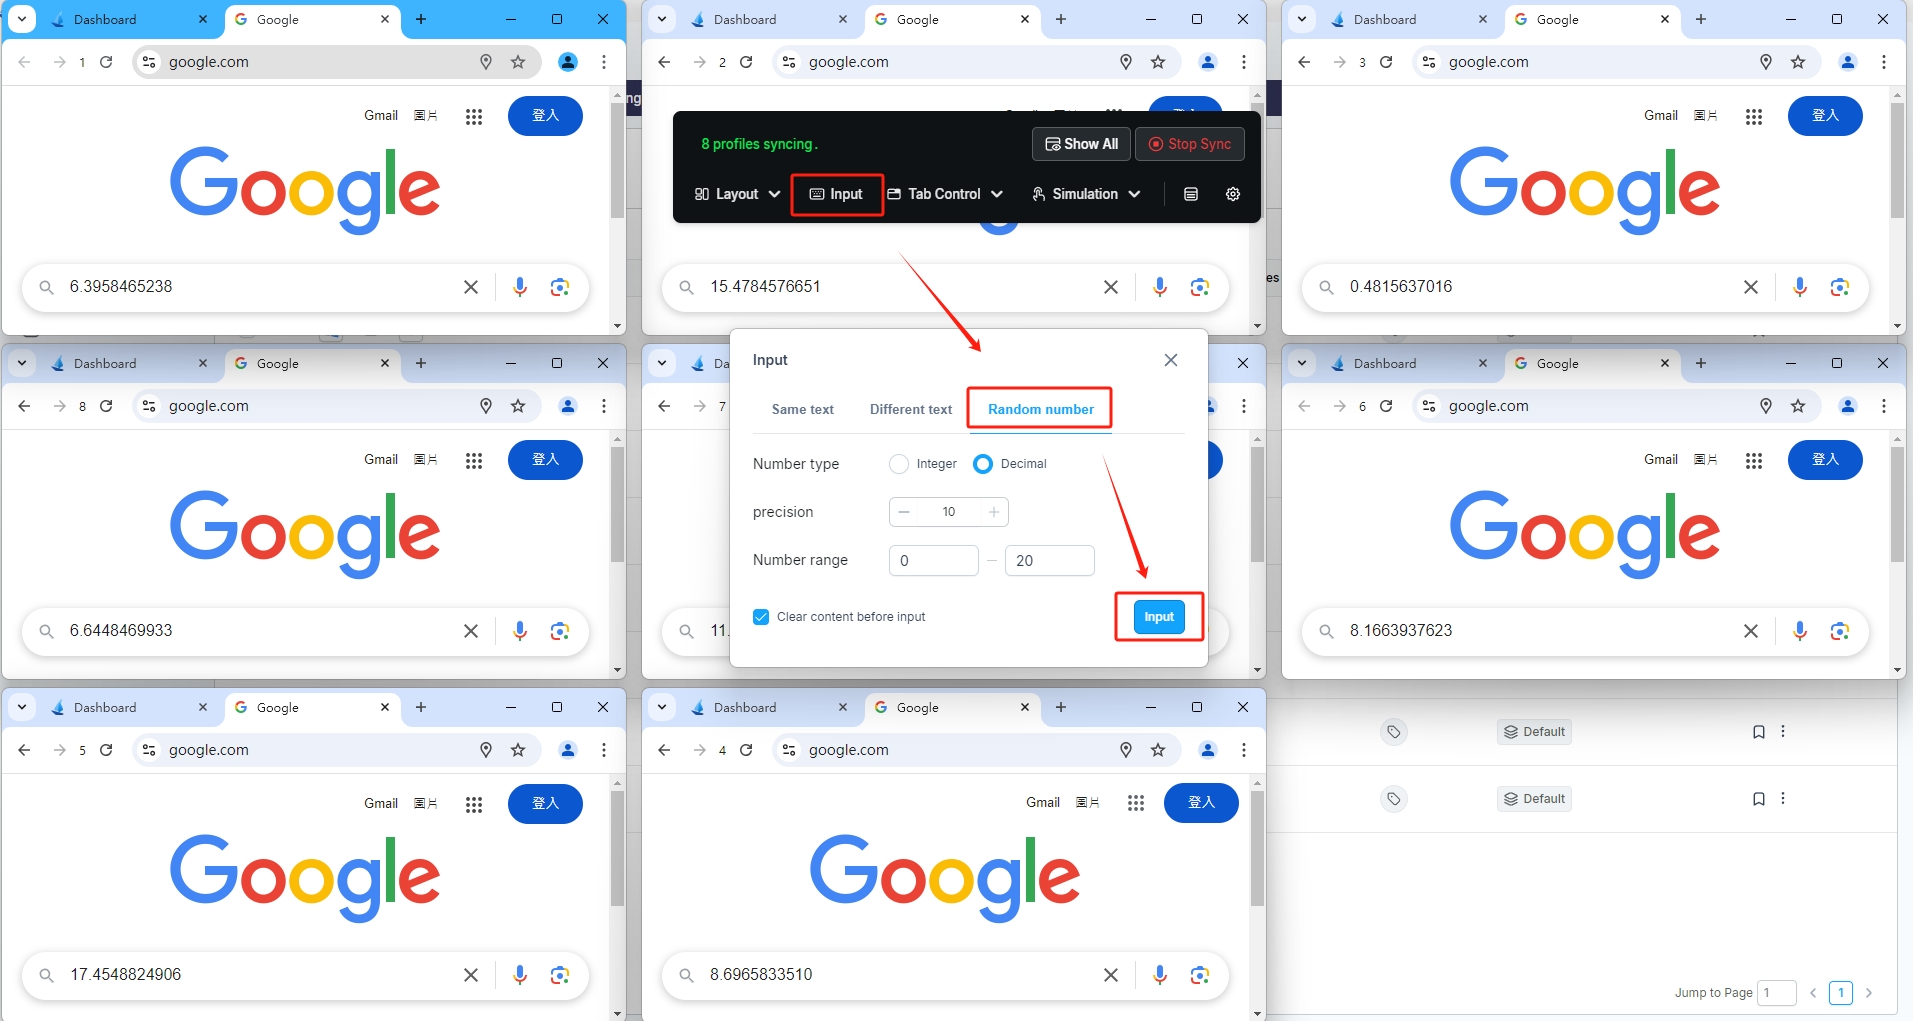
- Decimal:Up to 10 decimal places are supported.
- Clear content before input:You can choose whether to clear the existing content in the input boxes before batch input.
Tap Control
Close Other Tabs
- Select the tab you wish to retain in the main window.
- Click on "Tab Control" > "Close Other Tabs".
- Upon clicking, all profiles will close other tabs except the current tab selected in the main window.
Close Current Tab
- Select the tab you wish to close in the main window;
- Click on "Tab Control" > "Close Current Tab";
- Upon clicking, the current tab in the main window will be closed across all profiles.
Close Empty Tabs
- Click on the main window.
- Click on "Tab Control" > "Close Empty Tabs".
- Upon clicking, all open empty tabs will be closed accross all profiles.
Open URL
- Click on the main window.
- Click on "Tab Control" > "Open Website".
- Enter the URL(s) you wish to open, separating multiple URLs by line breaks.
- Click "Open", and all profiles will open the entered URL(s).
Simulation
Parameter Settings
- Set the click delay interval and input delay interval separately.
- Choose between parallel delay or serial delay modes.
- Parallel Delay:In this mode, all profiles execute actions according to the set delay interval simultaneously.
- Serial Delay: In this mode, actions are executed sequentially starting from the main window, following the set delay interval.
Click Delay
Enabling "Click Delay" will cause all profiles to perform click actions at a slower pace, based on the set delay interval and delay mode.
Input Delay
Enabling "Input Delay" will cause all profiles to perform input actions at a slower pace, based on the set delay interval and delay mode.
Profile List
You can view details of the currently synchronized profiles here. 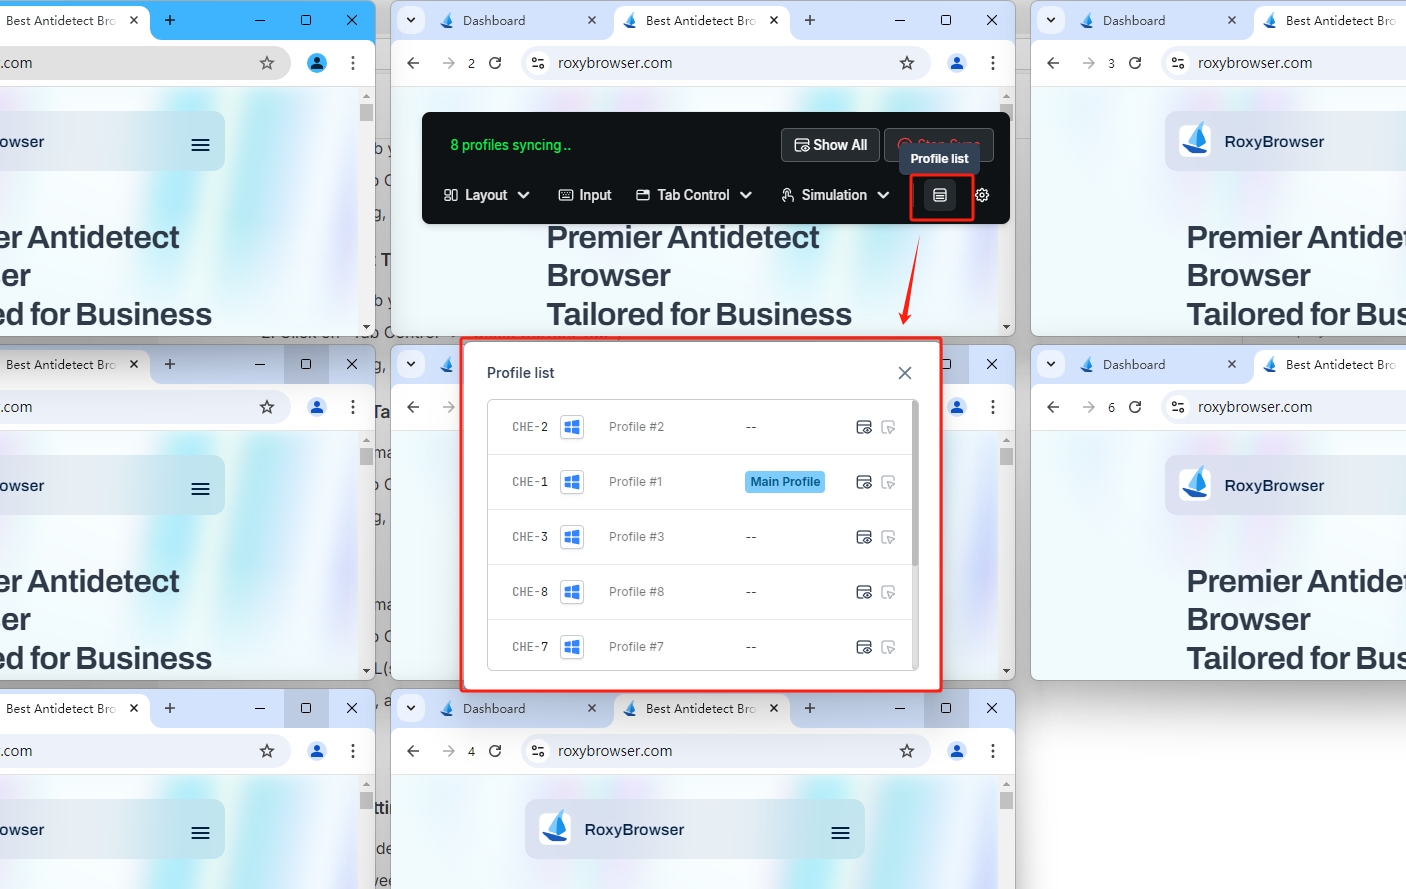
Settings
In "Settings", you can not only access "Parameter Settings" and "Custom Layout" entries but also configure the main window through "Basic Settings".
Basic Settings
Main Window Color: The main window is blue by default; you can change its color according to your preferences.
Keyboard Input: Depending on your needs, you can decide whether to sync keyboard input actions from the main window to the controlled windows.
Mouse Input: Depending on your needs, you can decide whether to sync mouse actions (clicks, scrolls, trajectory) from the main window to the controlled windows.